Recording velocity with Metric is straightforward and reliable. If issues ever occur, check you are recording video properly and follow the guidelines below.
This short video covers all the information in this article, alternatively read on for the detailed instructions.
Positioning your device when recording velocity
Metric is designed to be “point and shoot”, delivering reliable velocity and performance data without too much set up hassle from your in-app video recording.
There are a few limitations to where you can position your device when recording and the equipment Metric is able to track.
1. Equipment & exercises
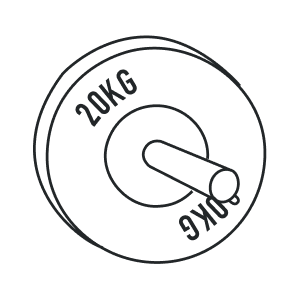
Metric measures velocity on strength and power exercises performed with a barbell (or trap bar) and circular weight plates. It does this using computer vision to find and track the barbell and weight plates within the HD video.
- Exercises in the Metric app that are velocity enabled have a 🅥 symbol indicating they can be tracked
- You can also create custom exercises and enable velocity tracking for these. These exercises should still be barbell exercises.
- Metric tracks circular weight plates, this includes bumper plates, training/technique plates, calibrated powerlifting plates, and iron plates.
- Plates with non-circular shapes, dumbbells, kettlebells, and bodyweight movements are not yet supported with velocity tracking. These exercises can still be logged in the app manually. See: Manual exercise entry →
- By default Metric is calibrated to 45cm sized plate but you can also set a custom plate size in the settings menu from the recording preview screen. See: Custom plate sizes →
2. Device positioning
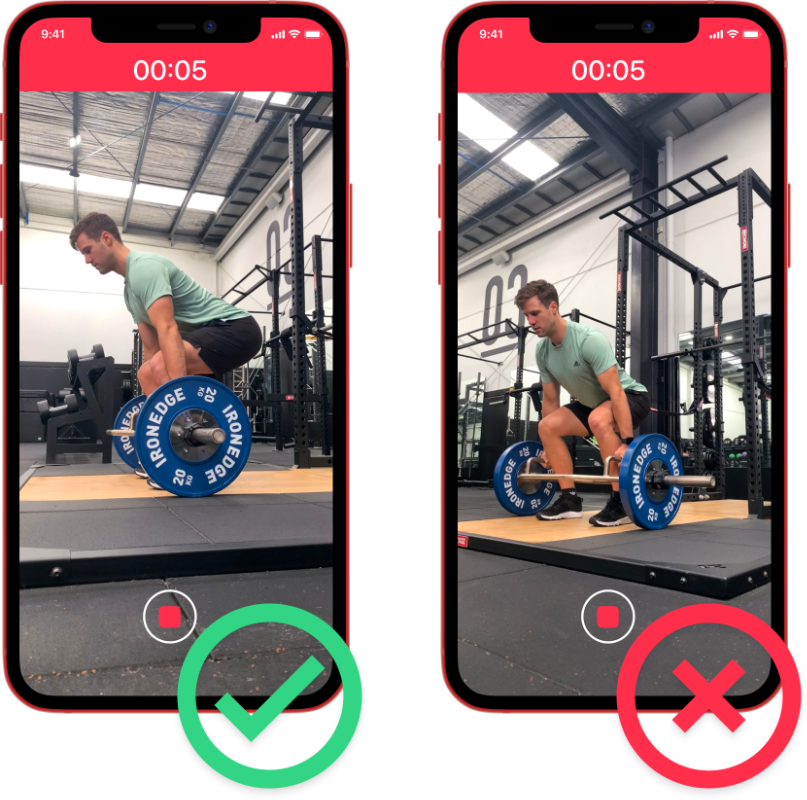
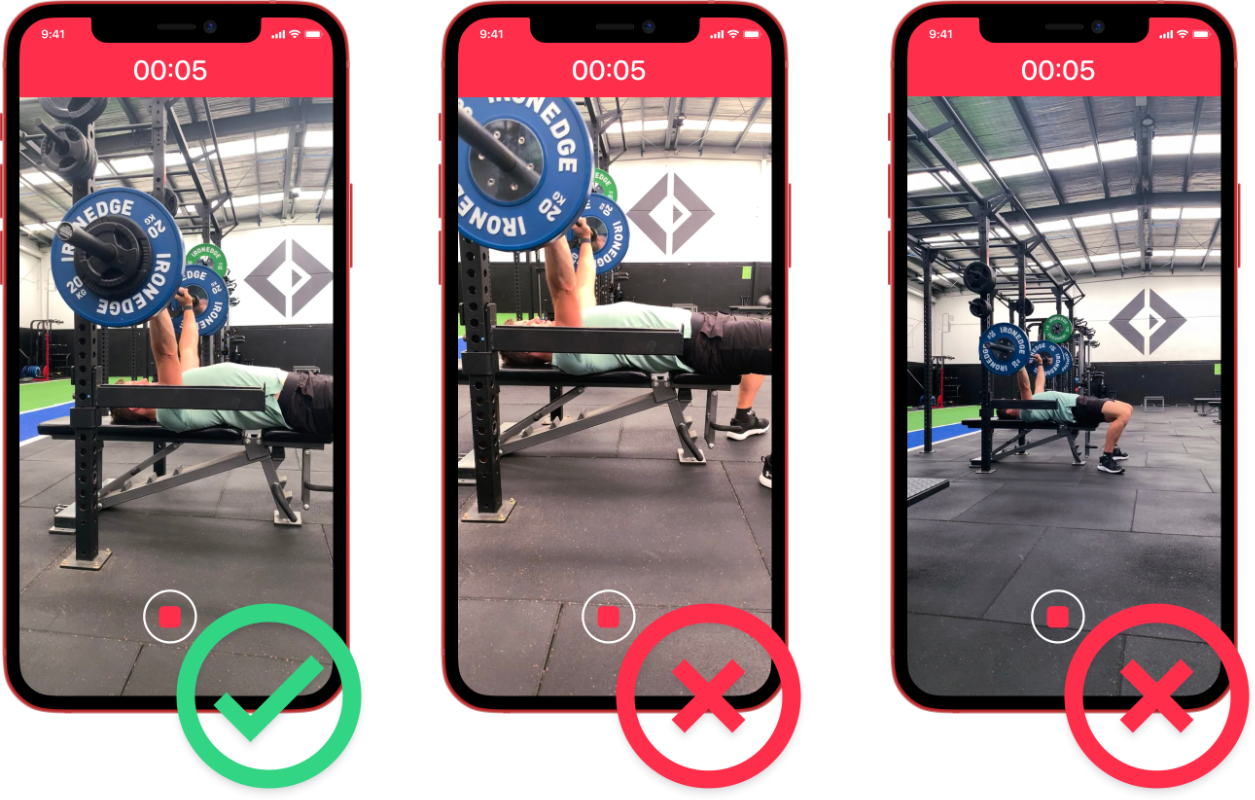
Metric needs to have an unobstructed, side-on view of the lifter, barbell and weight plates throughout the set - including the unrack and rerack phase.
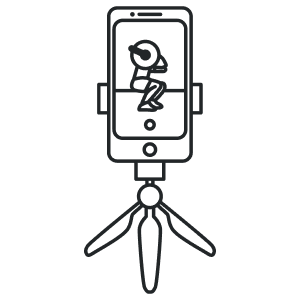
- The device must be completely stable and stationary throughout the set. Use a tripod or stable object to keep the phone fixed and upright. DO NOT record handheld.
See also: A guide to gym tripods → - Position your phone within 0º - 30º from the side of the barbell to ensure a clear view of the plates throughout the set. DO NOT place your phone front-on or behind the lifter.
- Use the zoom buttons or adjust the distance between your device and the barbell to ensure the lifter, plates and barbell remain inside the frame throughout the set
- For squats raise your device to be waist height or above, for overhead pressing & snatches, bring the device up to chest-shoulder height.
3. Lighting
Computer vision works similarly to human vision, if the camera cannot “see” the barbell then it cannot track it.
- Reposition the camera or adjust the angle to avoid direct bright lights.
- Avoid recording while pointing directly into bright light sources.
- Be wary of plates that closely match the color of the video background or nearby objects.
Try recording from the other side, or adjust the angle of the device slightly to avoid these bright light sources when recording.
Navigating the app to track your velocity
Depending on which Metric account type you have, the process for recording a set will slightly vary. Below is a step-by-step guide to using the Metric app to record a video with velocity data.
Metric Basic & Pro account
- Start a new workout or replicate from a previous template
- Add your first exercise to the session, then add one or more sets and enter your training loadNB: exercises with a 🅥 symbol are capable of velocity tracking, all others require manual entry
- Press the camera button on the first set row to open the recording screenNB: To enter custom plate sizes or enable advanced camera mode, long press on the camera button to be taken to the set up options
- Place your device in a stable position side on to the barbell according to the guidelines outlined in the device set up guide.
- Tap the record button and perform your set
- Tap the stop button when your set is finished. Tapping the timer also ends a recording
- You can now pick up your phone to enter set RPE, review your training data, and playback or export the video
Metric Teams (Coach Mode)
- Start a new workout or replicate from a previous template
- Add your first exercise to the session, then add one or more sets and enter your weight.NB: exercises with a 🅥 symbol are capable of velocity tracking, all others require manual entry. See creating your own exercises
- Press the camera button on the first set row to open the recording screenNB: To enter custom plate sizes or enable advanced camera mode, long press on the camera button to be taken to the set up options
- Position the phone in a stable position according to the guidelines outlined in the device set up guide
- Tap the record button and perform your set
- Tap the stop button when your set is finished. Tapping the timer also ends a recording
- You can now pick up your phone to enter set RPE, review your training data, and playback or export the video
Troubleshooting your velocity tracking setup
If you experience recordings that are missing data or seem off, it might be due to an environmental factor that is influencing your velocity tracking data.
When set up correctly, these are very rare and Metric will perform very reliably, it's most likely that this issue was caused by one of the problems below.
Computer vision works roughly like human vision: Metric needs to be able to "see" the weight plates in order to track your lifts with precision. The more clearly it can see the reps being performed in the video, the better the data from Metric will be.
Recording angle is incorrect
To get accurate data, you will need to record video between 0º - 30º from a side-on view of the barbell. Recordings from outside this range will fail to track each repetition.
Recording from too low of a position
For lifts done where the barbell moves above 1.5m (5ft) from the floor, you will need to raise the phone to ensure accurate tracking. For squats, bench press and cleans, raise your phone to waist height or above. For snatches, or overhead exercises, position Metric at chest or shoulder height. For deadlifts and rowing, the phone can be anywhere from floor to waist height.
Using a bench, plyometrics box, or extendable tripod can help with this.
Bright lights in the frame or dark gym environment
Recording in dark environments will make it hard for Metric to track reps, especially when the video background is also dark or the weight plates blend with the environment.
Glare from fluorescent lights or large windows can also impact tracking.
Position and angle the device so that these bright lights are reduced in the frame — especially try to avoid bright lights that are within the path of the barbell during the set.

Barbell, plates and lifter were not inside the video frame for the entire lift
Recording with the phone too close, too far away, or cutting off a portion of the weight plates during a rep will lead to inconsistent data and missed reps.
Lifting with alternative equipment/bodyweight
Metric tracks barbell lifts completed with circular plates, it is not calibrated for tracking bodyweight movements, dumbbells, kettlebells, or other implements. By default it is set to track 45cm regulation sized plates — setting a custom plate size is also available.
See also: Plate sizing guide →
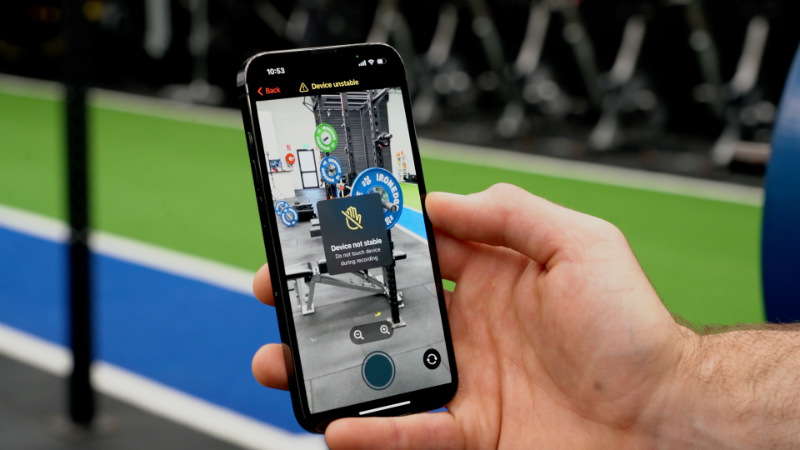
Recording was completed with a handheld device
Any movement in the device during your set can lead to incorrect calculations in velocity and range of motion data.
Securely position your device for the entirety of your recording, for best results we recommend a tripod like those in the article linked below.
See also: A guide to gym tripods →
Explosive lift tracking
Faster exercises such as jumps and Olympic lifts can experience motion blur when recording. To correct for this, Metric has additional camera setting - Advanced camera mode. This setting increases shutter speed in the camera reducing blur and improving tracking.
You can enable advanced tracking from the settings menu on the recording screen. With advanced camera mode enabled you may experience a flickering/strobe effect in your video, be sure to use the lightbulb button to correct for this.
Because of the limitations in camera technology it is only recommended to use the Advanced Mode in well-lit environments.
See also: Advanced camera mode →
Error messages in the app
Error messages might occur during recording when Metric detects inaccurate results or poor tracking environment. Below is a description of each error message and a suggested solution.
No reps detected
- Metric works with circular plates. Ensure they're visible in the video.
- Common issues: wrong equipment, poor framing, glare, or inadequate lighting.
- Consult our recording tips or send a bug report if the issue persists.
Solution:
- No reps could be caused by a number of factors, review the guidelines within this document along with the other error messages below for advice.
Bad viewing angle
- Camera angle affects accuracy, your recording angle has been detected to be outside the optimal 0-30º range.
Solution:
- Keep it between 0-30º to the side of the barbell.
- For high lifts, elevate the device for a better view.
Poorly framed video
- The barbell and plates went outside the edges of the recording frame.
Solution:
- Adjust position or zoom of your device to ensure the barbell, athlete and plates remain inside the video frame throughout the recording
No velocity loss
- Velocity loss shows the speed drop between the first and last rep.
- A single rep set or a set where the last rep is fastest will show 0% velocity loss.
Solution:
- This is less of an error and more just a quirk of how velocity loss is calculated, no need to make adjustments!
Low frame rate
- Your camera is limited to 30fps; . Check for a 60fps-compatible model or use another device.
- If you're on an older device with Low Power Mode on, it may restrict you to 30fps. Turn it off in battery settings.
Solution:
- Switch the camera used to record (front/rear)
- Change to a newer iOS device that supports 60fps video recordingSee: Supported device models →